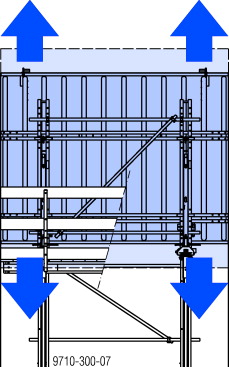
Plumbing & aligning the formwork

In order to permit exact adjustment of the formwork elements in relation to one another and to the structure, they are adjustable in both the vertical and the horizontal.
Tools needed:
▪ Hammer
▪ Reversible ratchet 1/2"
▪ Box nut 24 1/2" L
▪ Combination wrench 24 (for the threaded join on the adjusting spindle)
.
Preparing the adjusting operation
➤ Release the pressure wedge (A) .
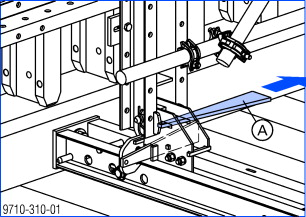
➤ Detach the formwork from the concrete.
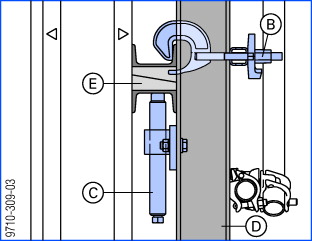
➤ Loosen the Waling-to-bracket holders (B) with a blow of the hammer.
The adjusting spindles (C) permit a vertical adjustment range of approx. 150 mm. Also, the adjusting spindles can be relocated in the hole-grid of the Vertical waling (D) .
|
E Timber wedges in the multi-purpose walings (near the adjusting spindles – for ensuring better load transfer) |
.
Vertical adjustment
➤ Turn both adjusting spindles.
|
|
While adjusting the height, watch the waling-to-bracket holders to make sure that they do not jam and block the adjustment process. |

.
Horizontal adjustment
➤ Push the formwork to either side.

.
Ending the adjusting operation
➤ Tighten the waling-to-bracket holders with the hammer.
➤ After adjusting the formwork elements, tighten the pressure wedges (A) .
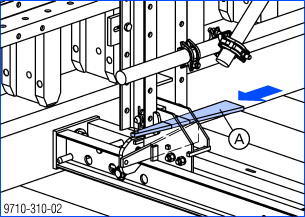
This presses the formwork element up against the previously cast section.
|
|
NOTICE It only takes a gentle blow of the hammer to fix the pressure wedge! The concrete loads are sustained by way of the form-ties and are not transferred via the wedge. |

.